Air filters are unsung heroes in our homes, quietly working to play a vital role in our HVAC systems’ efficiency and our indoor air quality. Whether you’re a seasoned homeowner or replacing your filter for the first time, understanding the basics is essential. Let’s dive into the world of replacing your air filter!
What is an air filter?
Air filters come in many shapes, sizes, and flavors. We have different filters like HEPA, MERV, fiberglass, media, UV, washable, electrostatic, poly, pleated, and carbon. The most common filter types that you will see in homes are fiberglass, poly, pleated, and media filters.
- Fiberglass Filters: These familiar blue filters are the minimum filter you should use for your HVAC system. They block large dirt particles while allowing smaller ones to pass through.
- Polyester (Poly) Filters: Synthetic filters, such as polyester, which we like to call poly, are a little better at blocking medium and large dirt particles.
- Pleated Filters: Imagine an accordion-style filter made from paper, cotton, or polyester. Pleated filters are great—they block large, medium, and small particles. However, they might block crucial airflow that your air conditioner needs.
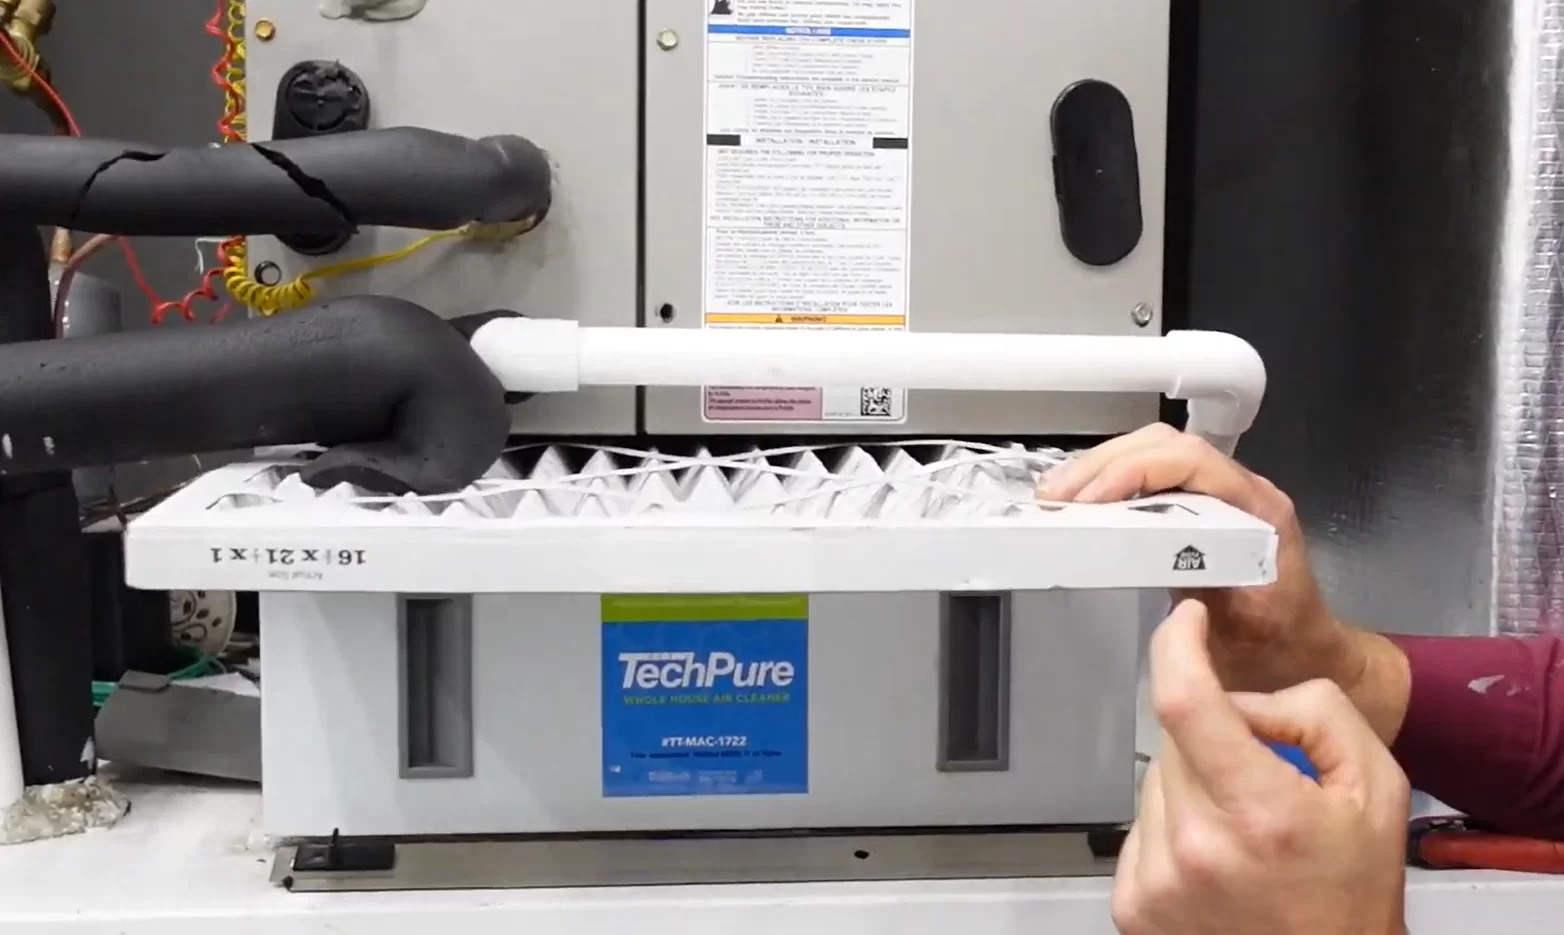
- Media Filters: Thick filters (often four inches, sometimes as large as six inches) with several layers of filter media. These filters have a massive surface area to catch contaminants like bacteria, pollen, and dander effectively. If installed correctly, these filters don’t need to be changed as often as typical 1” filters and won’t restrict airflow much as they clean your air.
Each one of these filters has its place and time to be used, but not every filter can be used for each situation. Most of the time, you will only have one of these types in your home. An air conditioner’s air filter needs to be clean and ready to filter the home’s air when the air conditioner comes on. Remember, the most expensive filter isn’t necessarily the best fit for your home. Consult with an HVACR professional to find the perfect match.
Where is my filter?
It isn’t uncommon for homeowners to ask us where their filter is, and it’s an important question. There are three main places where your air conditioner filter will be located:
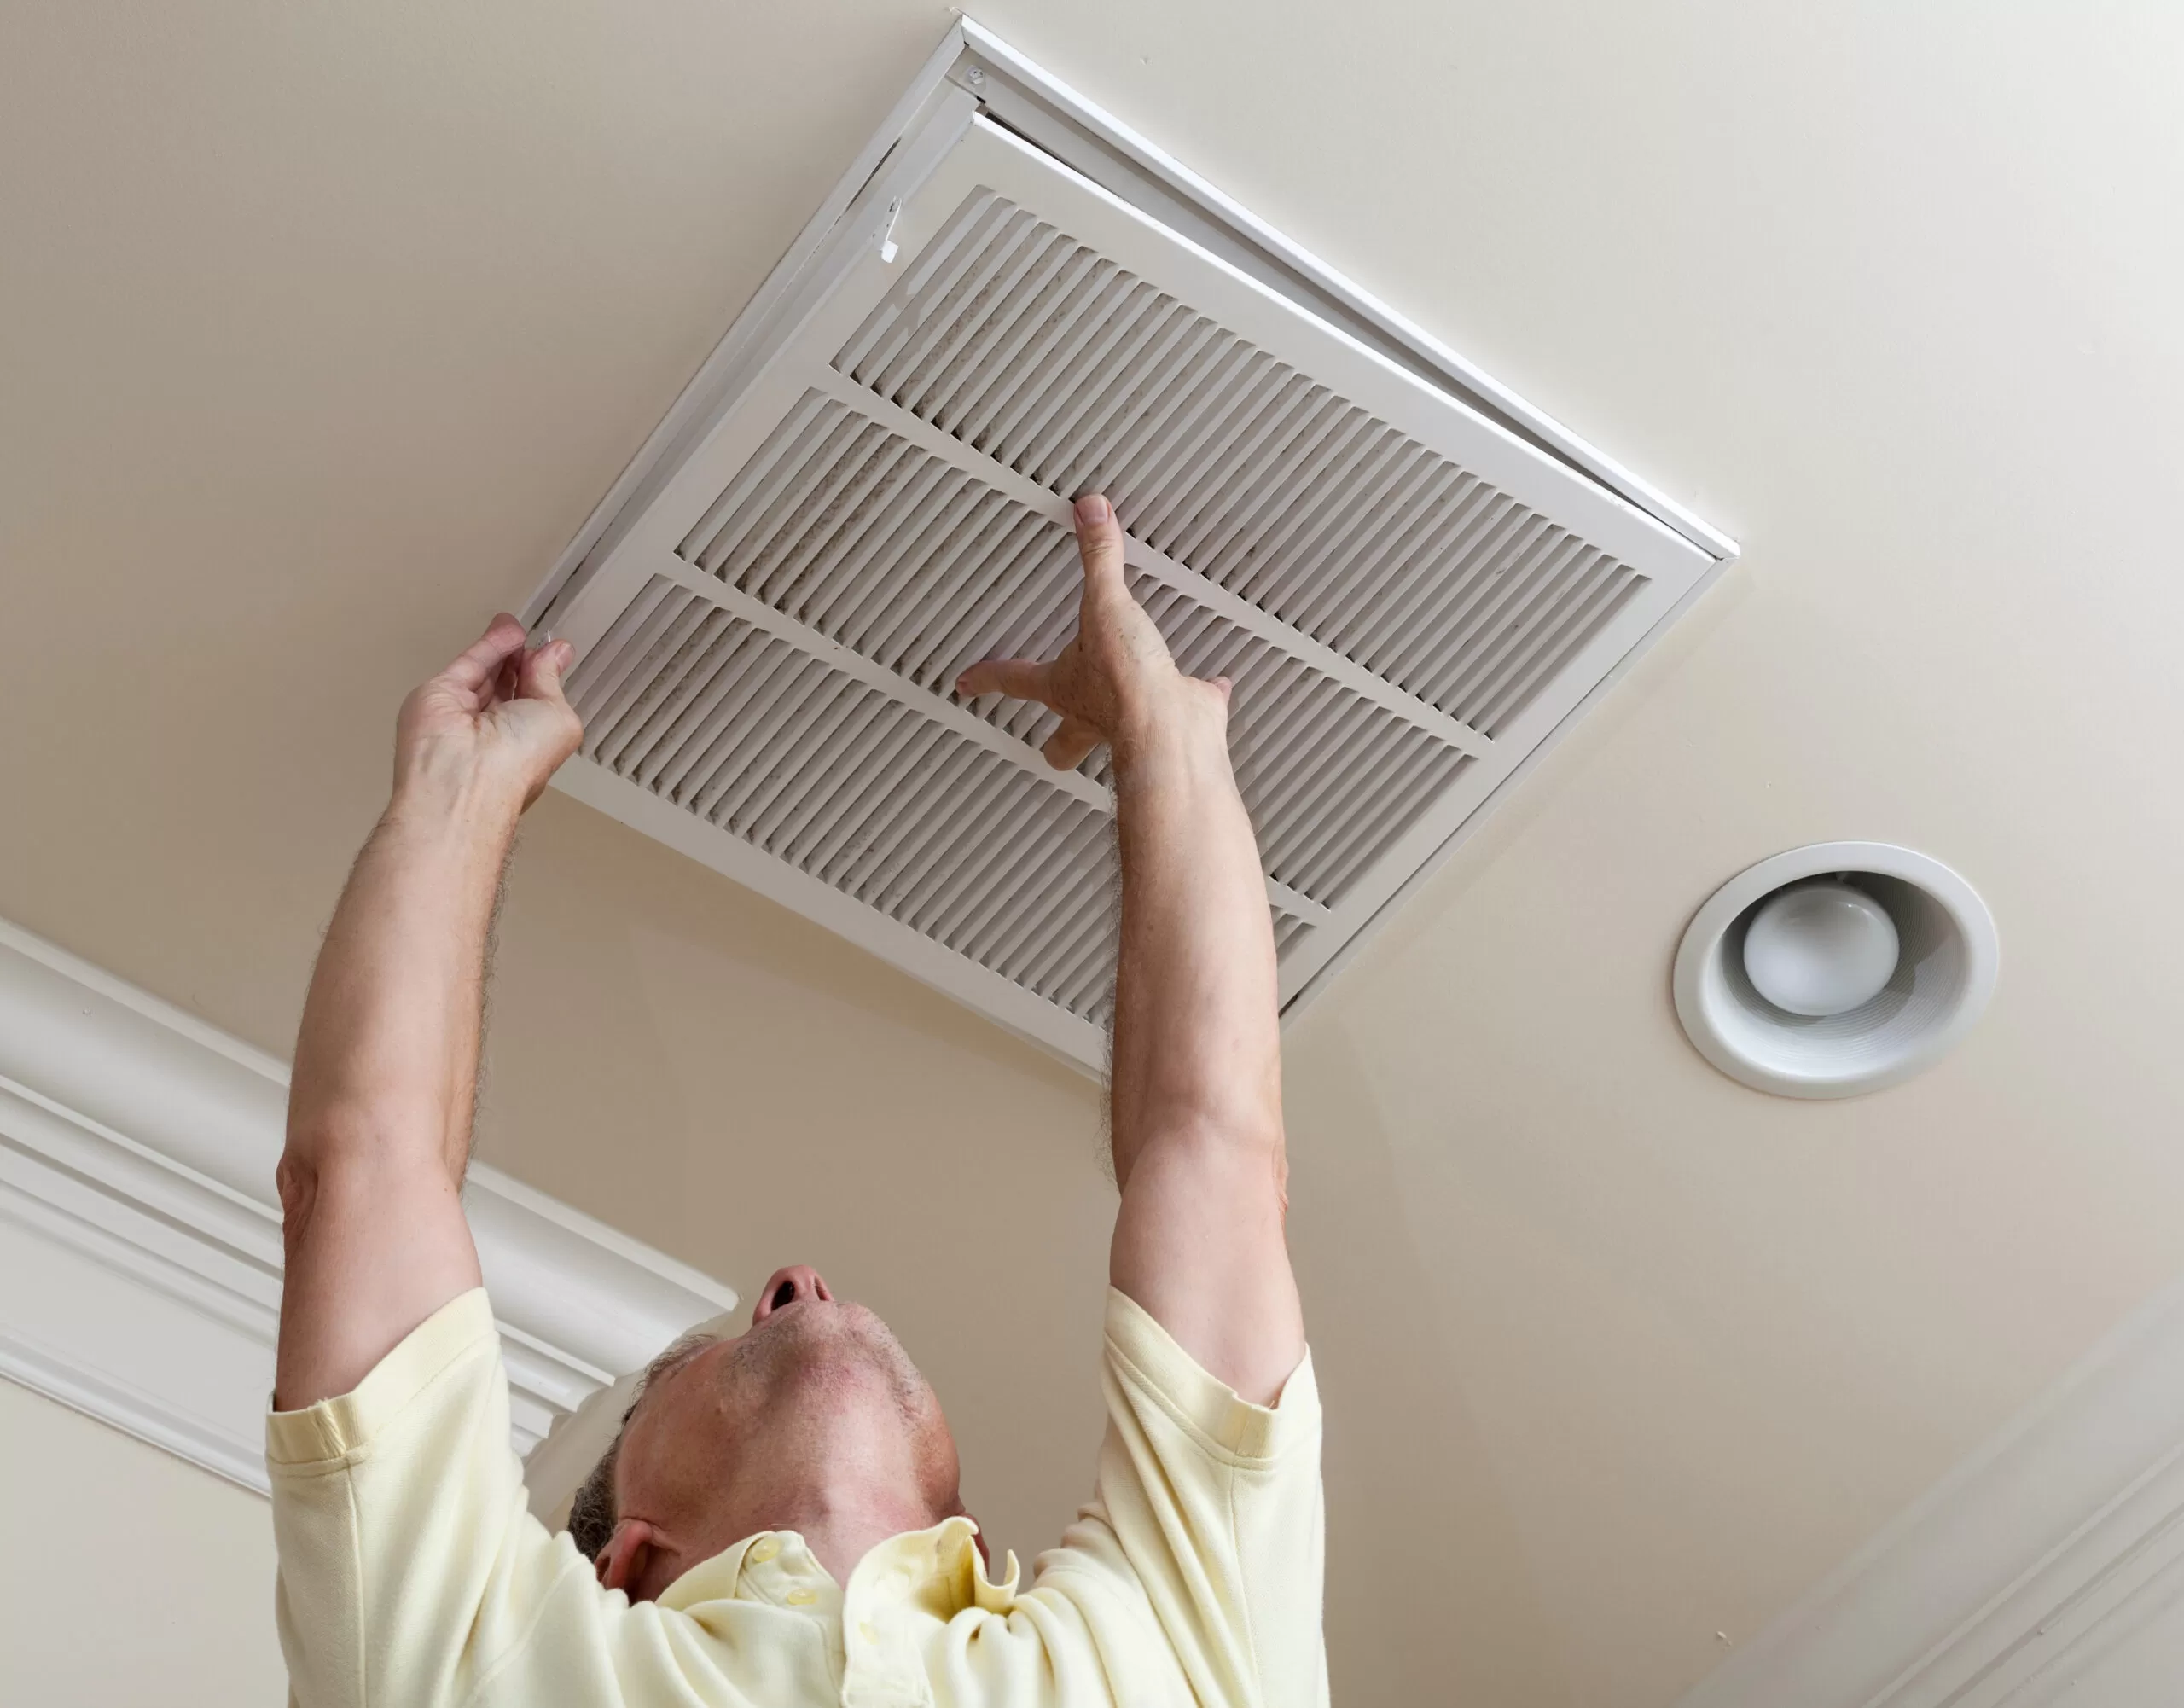
- Wall or ceiling: Most filters reside here and are white in color. You will be looking for a grille like the one pictured above.
- Floor: Some homes have filters tucked away on the floor, and they are typically brown. These aren’t very common in Central Florida homes.
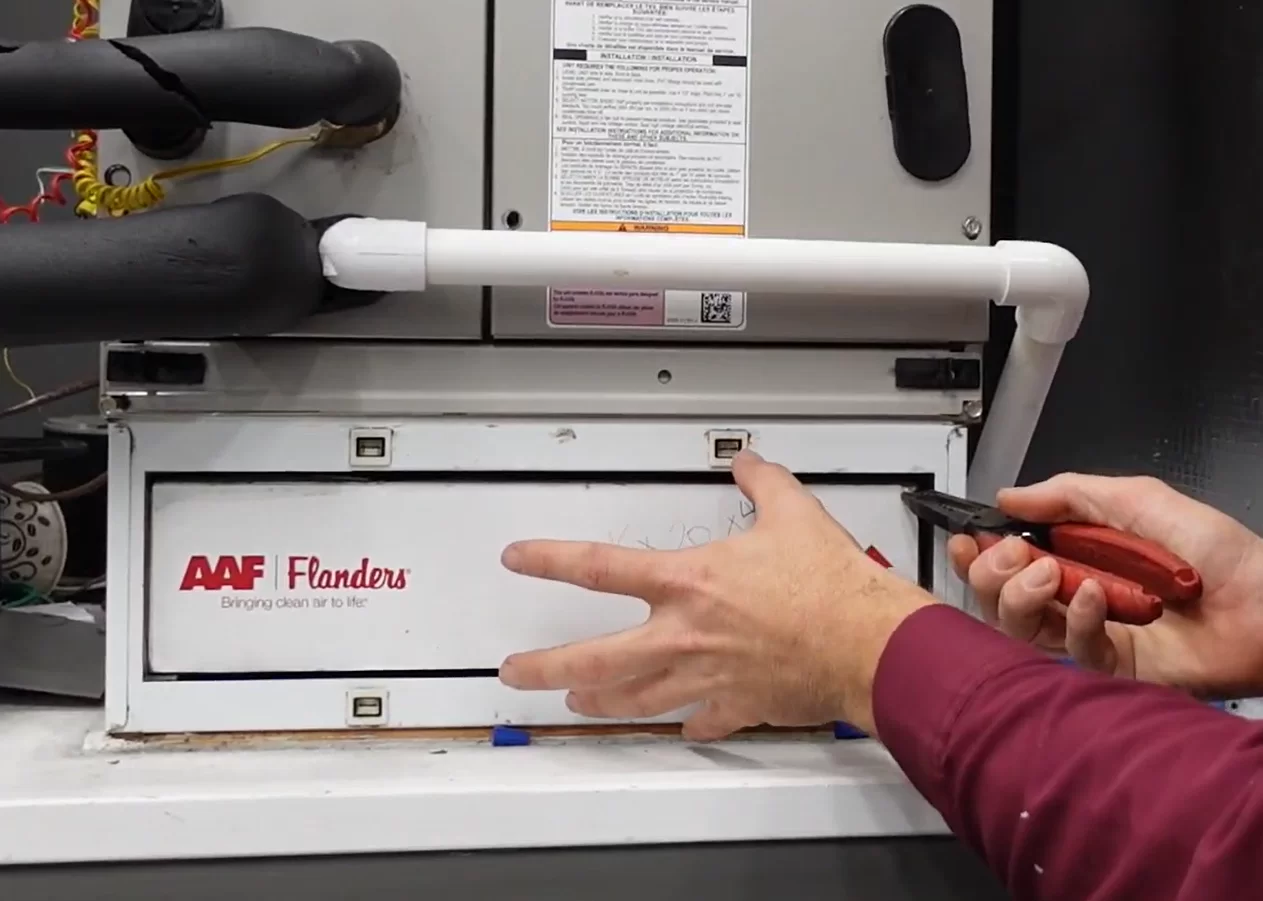
- Air handler/furnace: This is where the magic happens. Usually, there’s one filter here, and there is usually an access panel fastened by either tabs or screws. If space is allowed, you can even use up to a 6″ media filter.
It’s like a treasure hunt for better air quality.
Why do I need to change my filter?
- Keeping a clean filter will extend the life of your unit.
- The unit staying clean helps keep repair costs down.
- Good indoor air quality gives a cleaner home with fewer allergies and fewer medical visits.
- Dirt that gets by the filter can clog drain lines and cause a water leak in your home with thousands of dollars in damage.
- A clogged filter can allow dirt to get to the blower and evaporator, which can cause it to freeze up.
- Slow airflow can cause ductwork and/or vents to sweat.
- If moisture is present, mildew and mold can thrive in a humid environment because of the lack of humidity removal.
How do I change my filter?
You may have either disposable filters or washable ones. Disposable filters must be swapped out regularly, and you can throw old ones away in the trash. Washable filters can be removed, cleaned, allowed to dry, and reinserted. The following step-by-step process will help you change your filters the right way:
- Turn off the system: Before replacing the filter, shut off your HVAC system. Safety first!
- If you are using a ladder, have someone hold it on the ground. Never go higher on the rungs than recommended.
- Pull out the existing filter. You may need to grab onto it with a set of pliers to help you start pulling it out. That is fine.
- Filter size: One size doesn’t fit all. Use the right filter size—no shortcuts! Your filter’s size should be on the side of it, if not take it into the store or measure it with a tape measure and round it to the nearest inch.
- Insert the new filter, ensuring proper airflow direction: Those little arrows on the filter matter. Install the arrows pointing upward to prevent the filter from bending or bowing. Think of it as putting on a superhero cape—the right way. The filter may catch on some things inside the unit as it goes in; this is normal, as the filter is supposed to fit snugly. Gently vibrate it a little and work it in.
When do I change my air filter?
I am going to give you what to look for and listen to, but you will find a combination of filters and time frames that will work for you and your unit.
- Change it if it is dirty.
- Replace it if it starts to bow and lets air around its outside edges.
- If you are hearing a whistling noise around the return, that is a good sign your filter is past due to be changed.
- Set a Schedule: It is your Filter’s Best Friend. Put it in your calendar on your phone and enjoy the savings.
I once heard a military person ask, “When should a soldier need a haircut?” The answer is that they should never need a haircut. If they need a haircut, they are already out of uniform. Air filters are the same way. If your filter needs replacing, there is dirt that has gone through or around the filter already. This dirt gets on your coil and blower wheel. This blocks airflow, which makes the air conditioner work harder. It will make rooms hot or cold, and it will run up your power bill.
My favorite way to check my filter is to compare it to a clean one. If I check it every two weeks, it tends not to look dirty each time I look at it. But if I compare it to a new filter, it will give me a baseline to look at. Changing your filters on a regular basis is your first line of defense against the air conditioner breaking or not working at 100%.
If there is dirt buildup on your filter, it is time to change it. Your filter may say one month, three months, or even six months, but it doesn’t know what your home is like. If it gets dirty in three weeks even though it said it is a 6-month filter, then it’s a 3-week filter for your home. Remember, your filter doesn’t know where or when it’s installed—it’s counting on you!
If you have any questions about replacing your filter, consult your local HVAC contractor like Kalos Services. Keep your system humming, your bills in check, and your air fresh. Happy filtering!